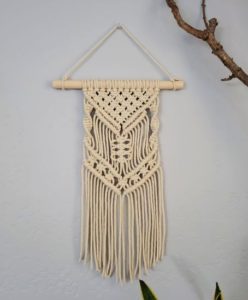
Hey there! Welcome to the materials page for macramé. (For the short list, scroll all the way down!)

If you’re here, you may have seen the macrame craze online, on Etsy or Amazon, on the walls of Anthropologie and maybe even hanging around the house that your parent or grandparent have made in the past.
Full transparency – I’m a jack of all trades but master of none. Which means, if you’re looking for a very professional macramé artist with decades of experience…you won’t find it here. What you WILL find, is someone who is dedicated to helping other beginners through this creative journey – with step by step instructions, tried and true advice to share my success and mistakes along the way.
I’ll share videos and other artists who may have a better example but this website is for you to utilize it in a way that works for you. I hope you end up staying – enjoying the step by step pictures, the suggestions and ideas – and of course, me. Hah I joke. Sort of.
OKAY so lets just get into macramé. I won’t be going into the history and background of this art because…Google. If you’re really interested, you can google it or get a book on it – there are some great books on this craft but if you’re antsy like me, we just want to jump into learning knots and designs. You’ll find posts for specific knots, designs and simple patterns. (One day, I hope to get to complex patterns available for you for free).
Essential Materials:
Depending on what you plan to make, materials range from key rings, dowels and even just some cord. But I’m listing out the very basic requirements.

- Cord
- Scissors
- Measuring tape
- Place to anchor your project
- Dowel or branch (optional but most beginners start with a dowel)
- Your hands.
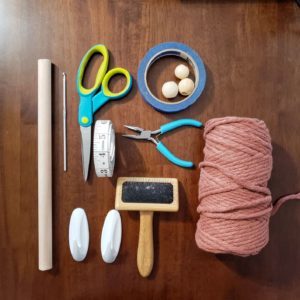
That’s it! Again, it’s just the basics. The above picture has a few more things that are nice to have but not absolutely necessary.
- Cord:
You can use a lot of different types of cord, but start with cotton. Based on whether you want the frayed look or not, you can choose single strand or multi strand for your cotton cord. (I’ll have another post with more details on cords) You can purchase cords on Etsy (to support small businesses) or Amazon. If you’re strapped for money, you can purchase cheap cotton cords on Amazon so you can “research and develop” your passion without committing to a lot of $ for better materials. - Rod: Not necessary unless you plan on making a wall hanging. Dowels, branches, metal piping or even just more cord. You can use almost anything – it depends on the look you’re going for. You can find branches on your walks around the neighborhood (please don’t cut off wood from random trees). You can also purchase dowels at your local hardwood store.
- Corkboard, coat rack, wall hooks, etc. as an anchor: Its good to have some sort of anchor for your project for when you pull against it to tighten the cords. I attached command hooks to the wall according to a comfortable height for my arms and shoulders. As you knot down, you can grab a chair or stool and stay ergonomically safe! Make sure you check yourself – I get lost in it sometimes and I’ll wonder the next day why I have a giant knot in my neck. See what I did there? HA
- Tools:
Scissors – I recommend some sharp ones – fabric scissors are great.
Rubber bands or additional cord – When your cord is long, it can be a pain to pull all that length through a loop. Its faster and easier if you bunch them up and wrap them so you can work the knots faster.
Measuring tape – To measure out cord.
Crochet hook – useful for tassels, rya knots and finishing up the back of projects.
Tape – I use painters tape. The ends of cords can fray too much while I’m working the cord so you can wrap it with tape. Other times you can use it to create a sharp point to pull through a bead. - Accessories:
You can use metal rings, wooden beads, different cord materials, hoops, etc. The creative possibilities are endless.
Short list:
You need cord, scissors, measuring tape, an anchor (hooks on the wall), and your hands.
Look for my step-by-step instructions with pictures for your knots. I hope it’ll help cultivate a new hobby!
